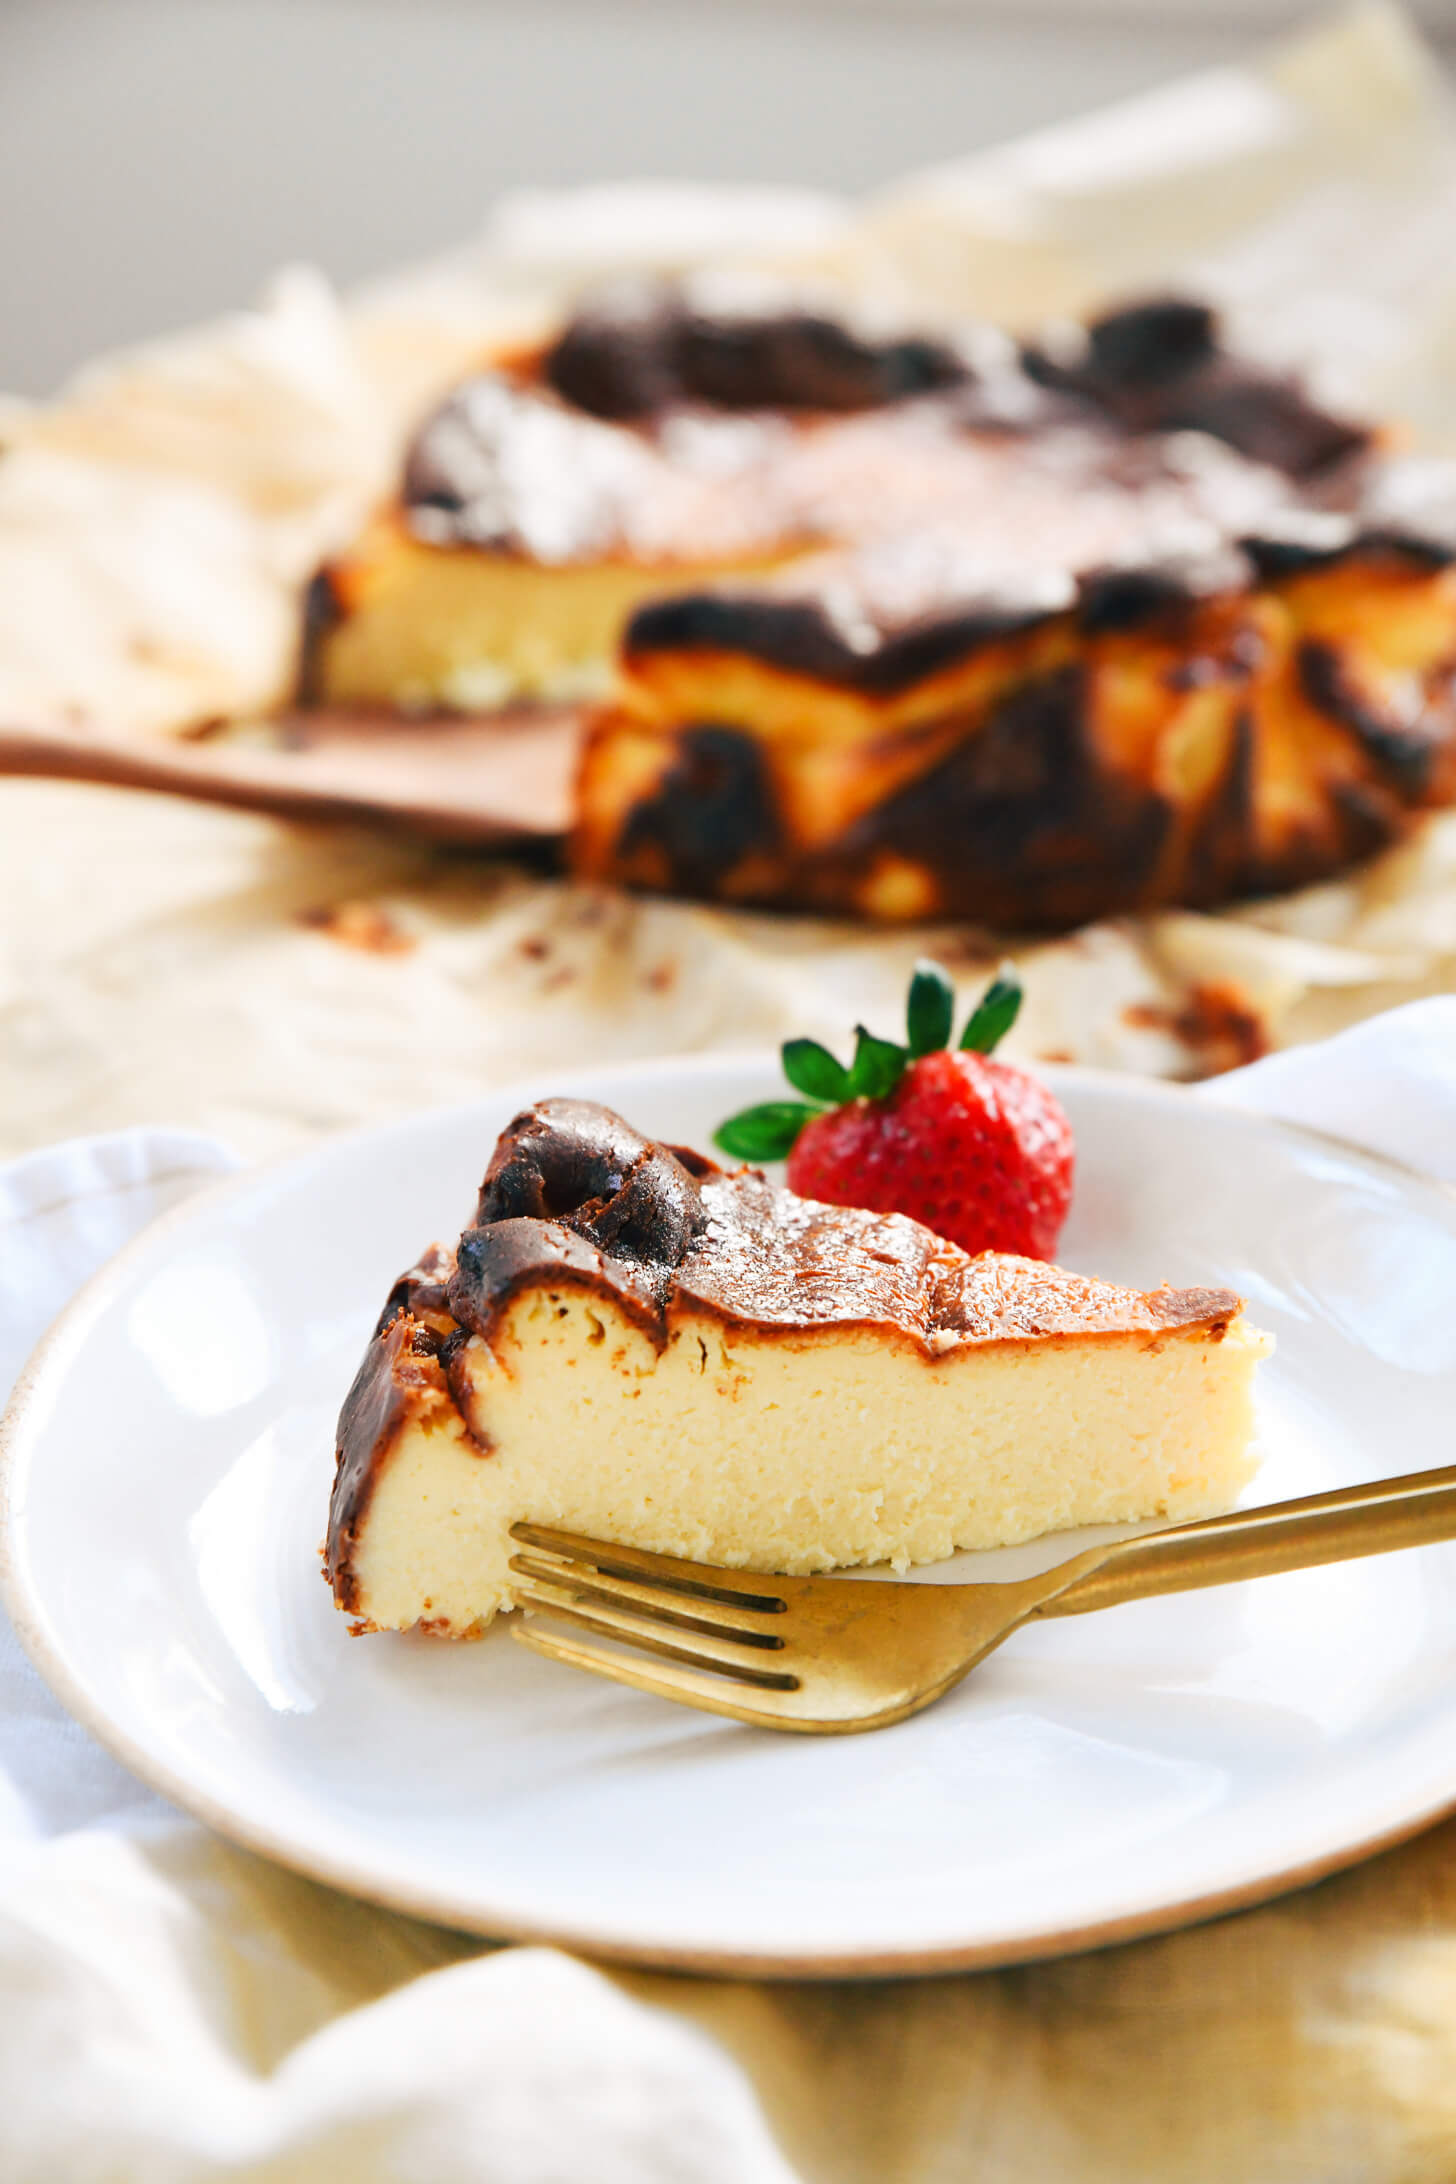
Behold, my favorite luscious dessert! This cheesecake recipe hails from the Basque region of Spain—specifically, from a restaurant called La Viña, where fresh cheesecakes line the walls and smell like heaven.
Honestly, I’m not sure why this cheesecake (tarta de queso in Spanish) is called Basque cheesecake over here. We should call it La Viña cheesecake or Santiago Rivera’s cheesecake to give full credit to the man who created the concept in 1990.
We enjoyed the real deal on our honeymoon in San Sebastián in 2019. We spent the evening wandering through the old part of town, sampling pintxos and sipping marvelous inexpensive white wine everywhere we went, as you do in San Sebastián. I insisted that we make room for the magical, mythical cheesecake at La Viña, so we followed our noses around the corner until we found it.
Fast-forward a few years, and we’re sleep-deprived with a baby at home. My husband brought home a surprise Basque cheesecake from a local shop. We’ve been obsessively recreating it at home ever since, trying different methods and proportions. I’m super excited to share the perfected recipe with you today.
6 Reasons to Love Basque Cheesecake
Before we get to the recipe, here’s why you’ll love Basque cheesecake. It’s an experience!
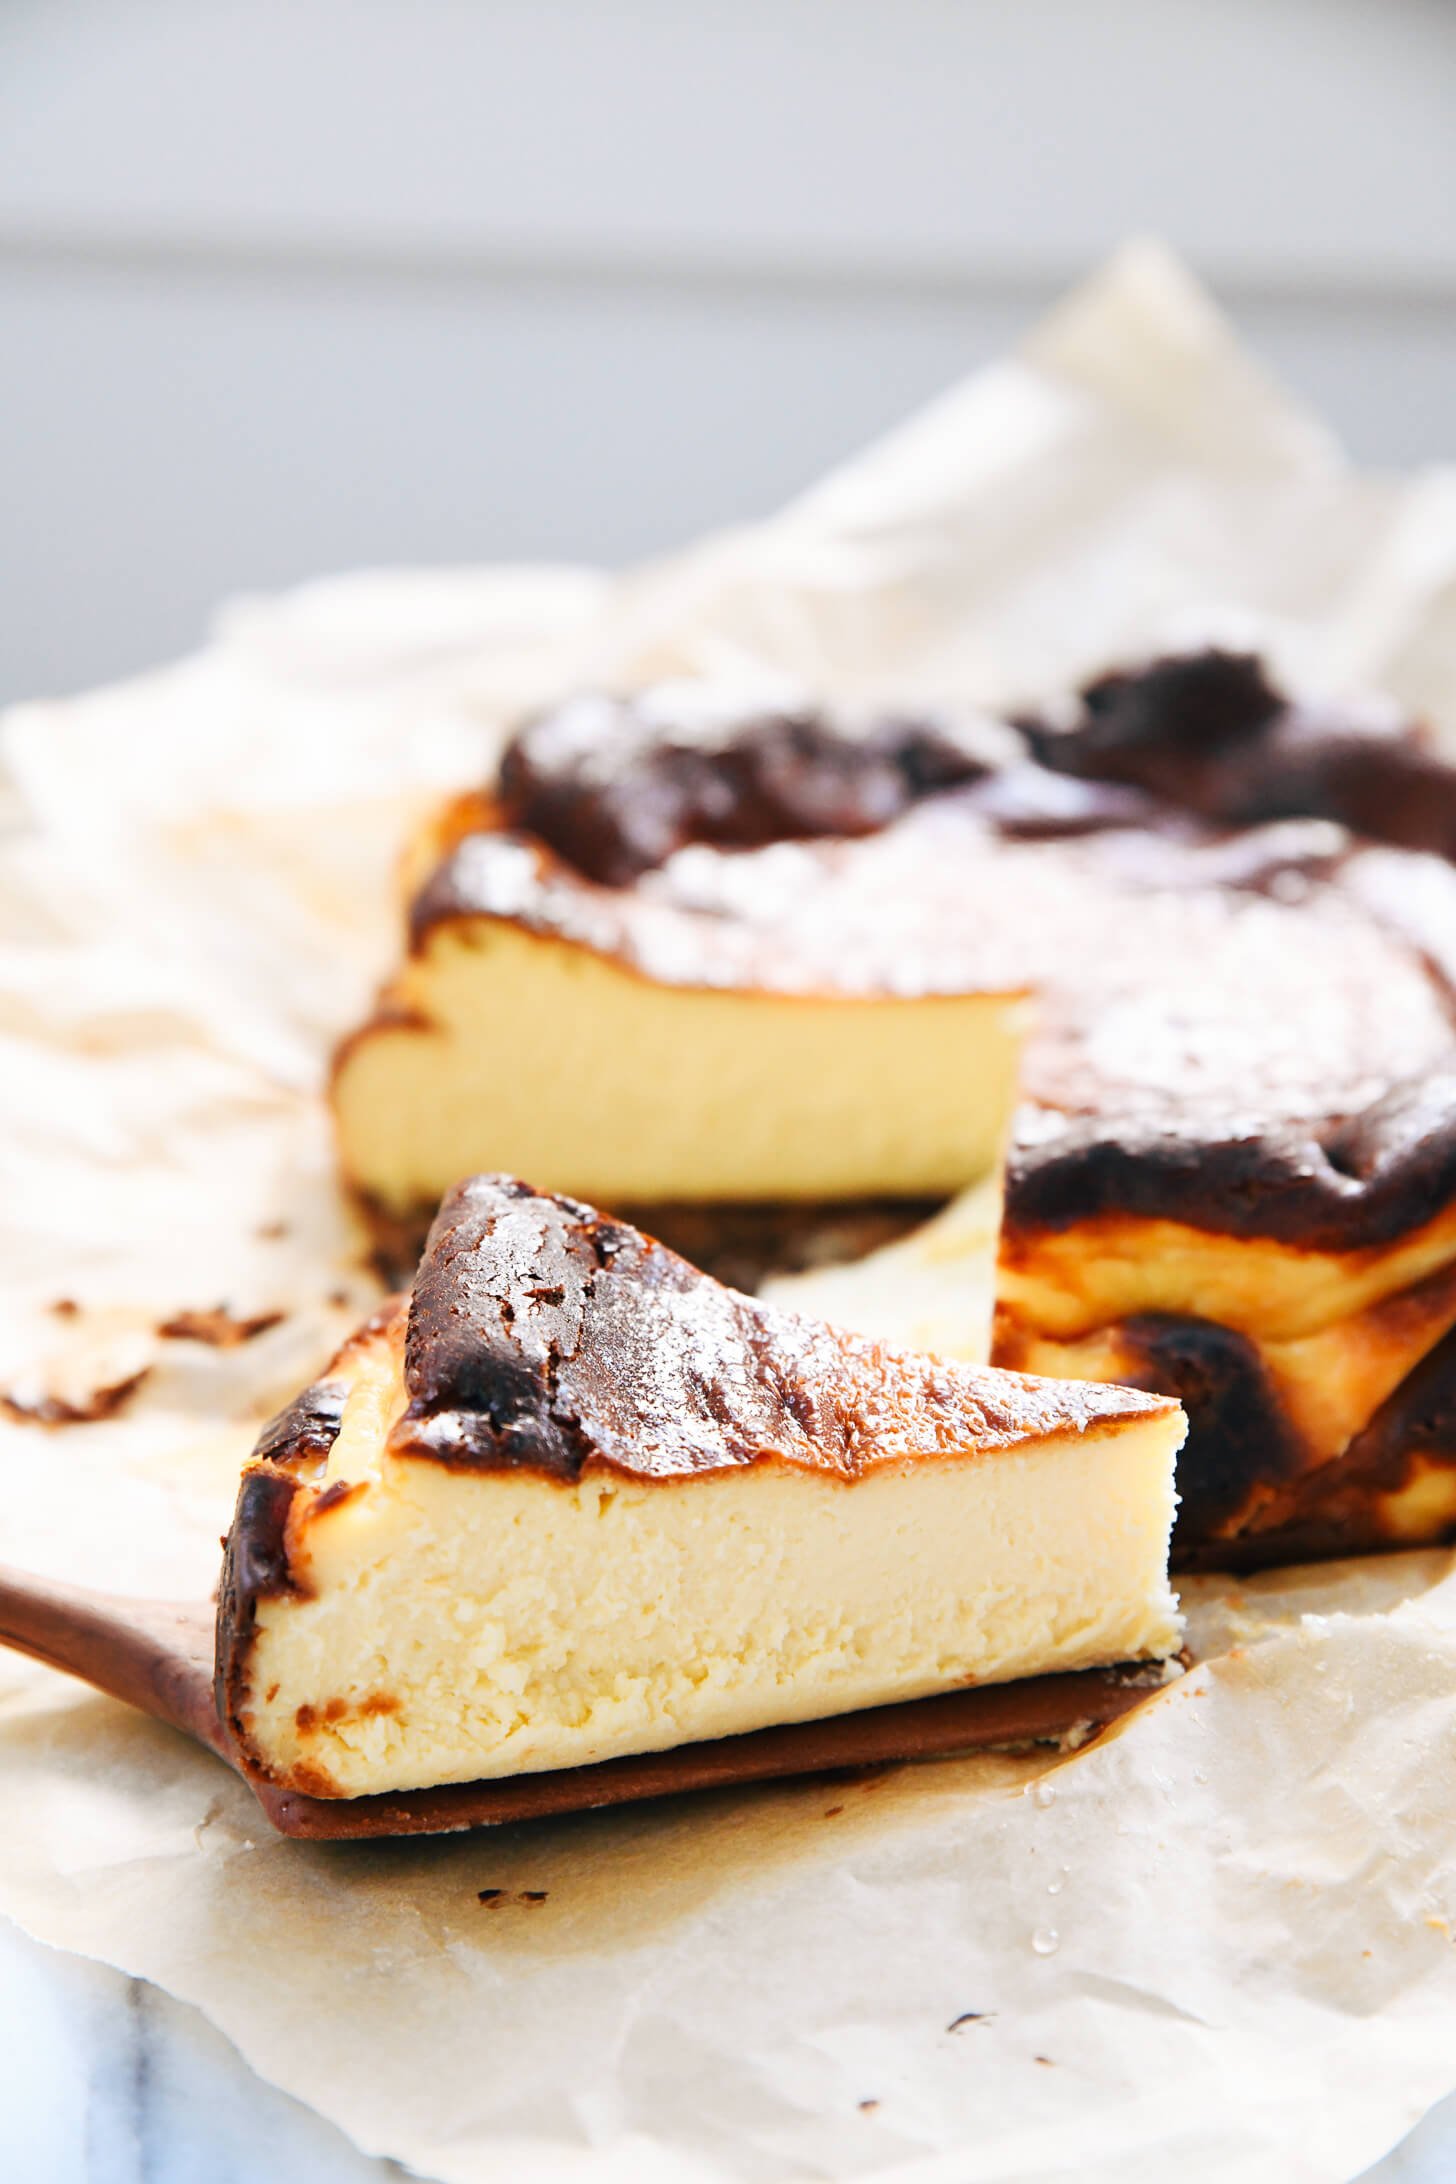
- Basque cheesecake is remarkably delicious. It’s creamy, rich, and tangy with a deeply caramelized crust on top that offers tons of flavor.
- Basque cheesecake is the easiest of homemade cheesecakes. If you have the ingredients, you could make it on a whim for any occasion—for Valentine’s Day, a celebratory dinner, a potluck with friends, or just as a fun weekend project. Just keep in mind that it will need about an hour to cool, and it’s a great recipe to make a day ahead if that timing works for you.
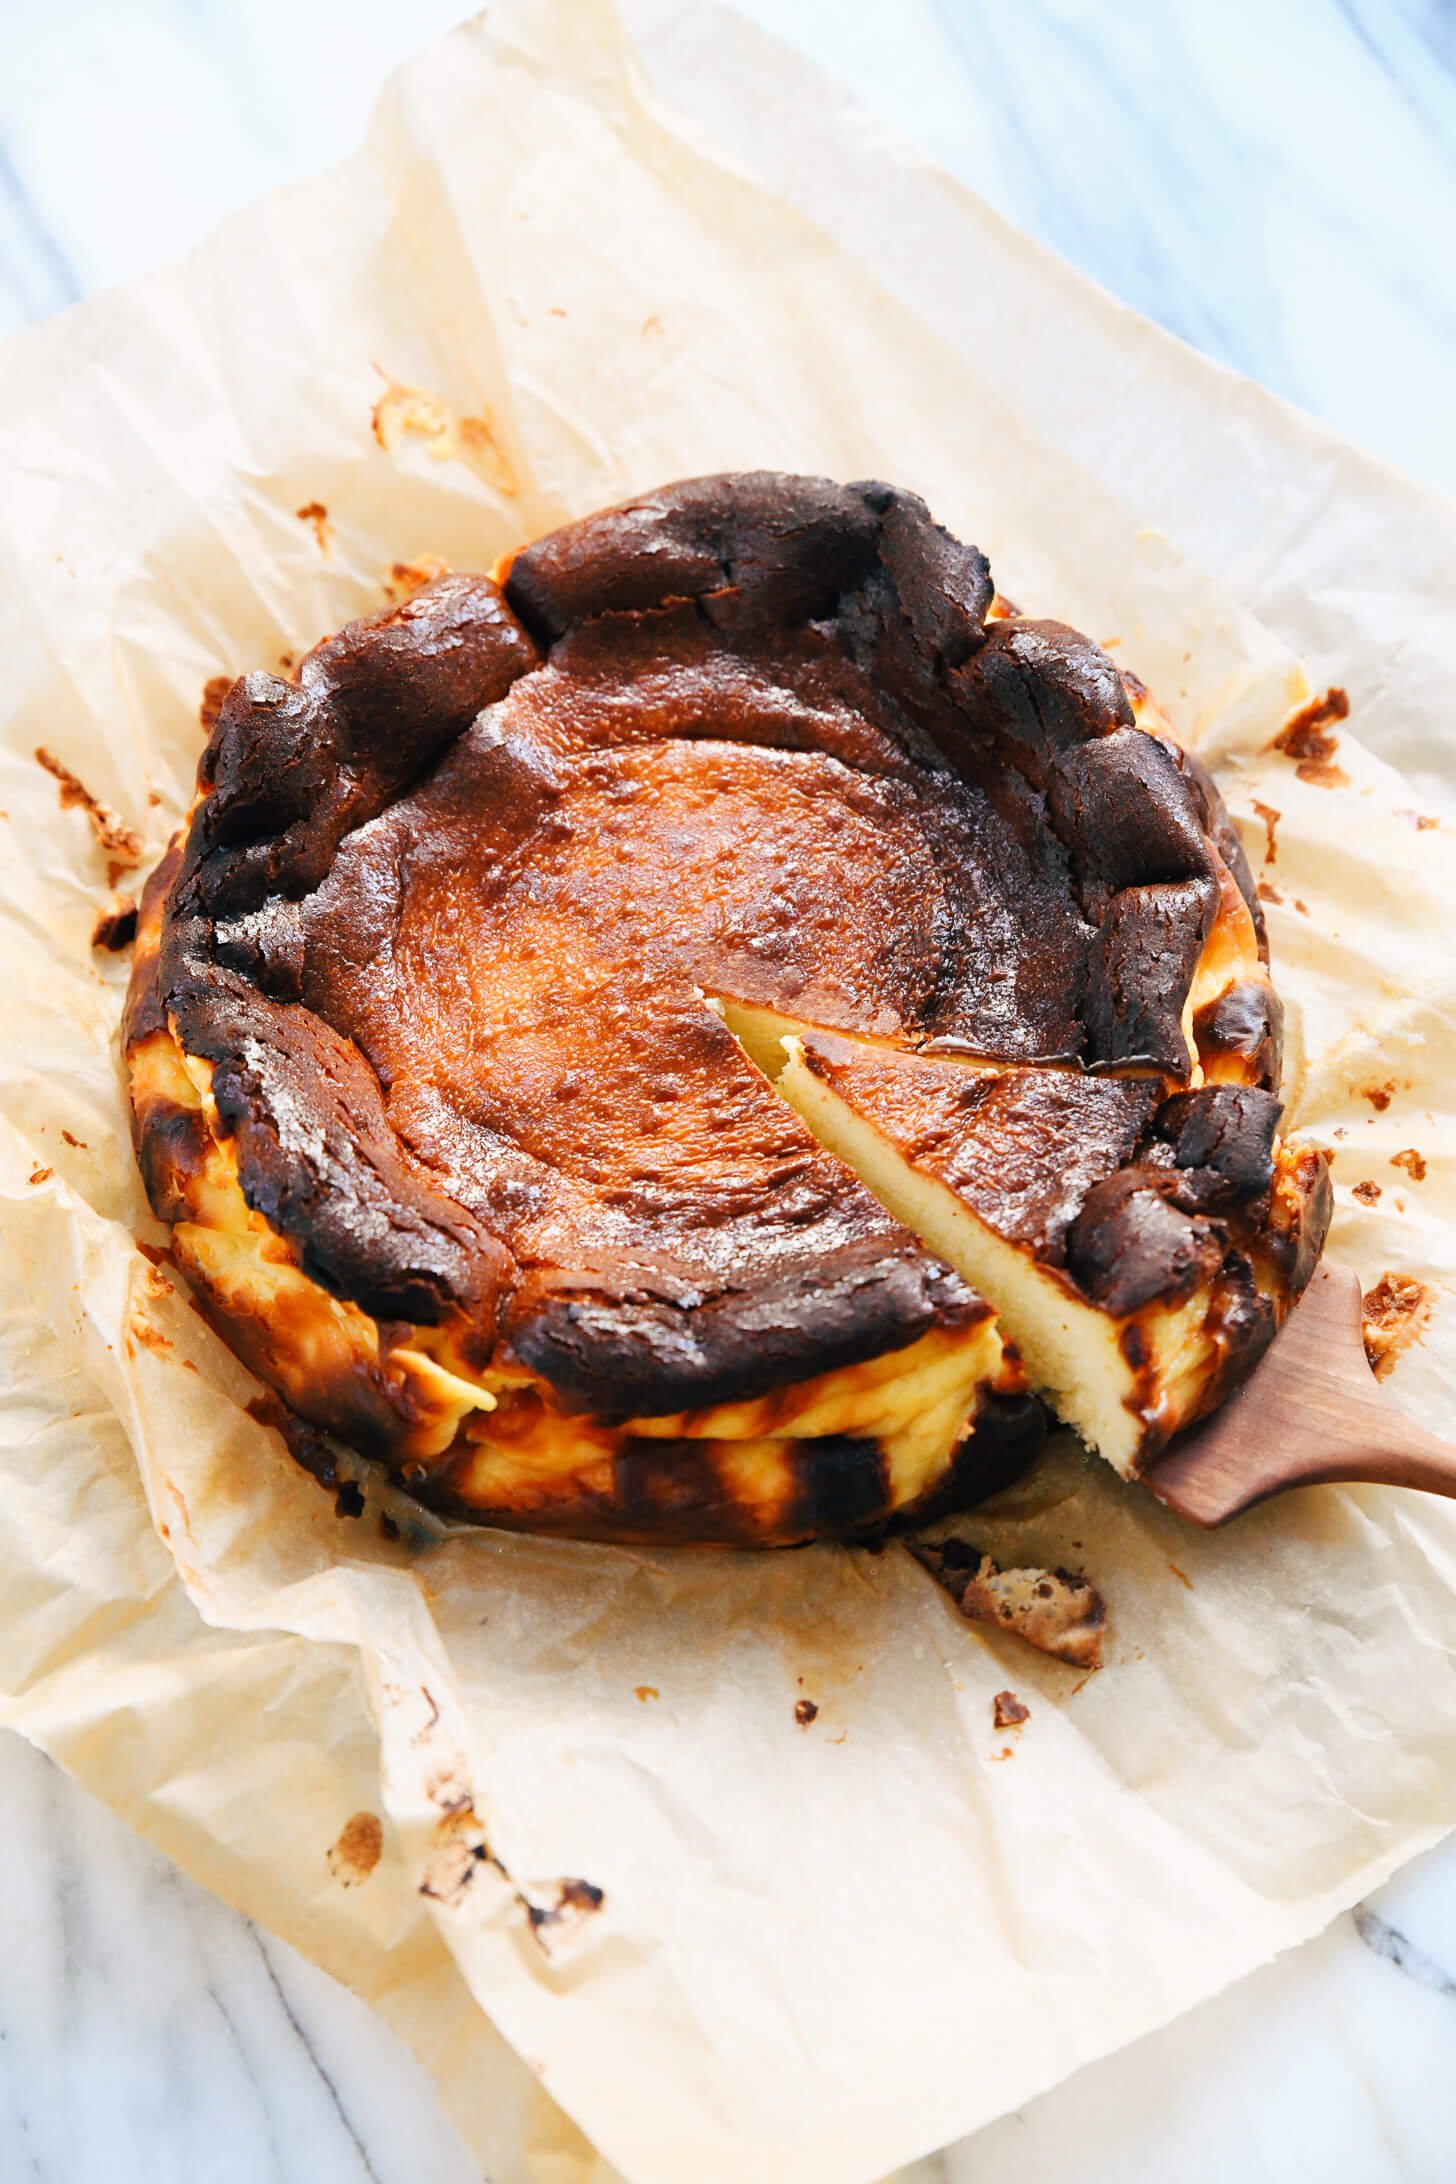
- No water bath required for Basque cheesecake. Indeed, we want the top to crack. Embrace it!
- There’s no crust to fuss with. Again, embrace the experience. With the amount of flavor in the caramelized top, you won’t miss it.
- It’s not too sweet. Traditional cheesecake can be way too sweet, and Basque cheesecake is not overwhelming in that way. The recipe below offers a range for sugar content so you can make it suit your taste buds.
- Basque cheesecake freezes well. Store any leftover cheesecake in the freezer for several months, or bake an extra to have on hand for your next celebratory occasion. You can cut the cheesecake even when it’s frozen, so you can pull out a slice any time you’d like.
Basque Cheesecake Ingredients
Here’s what you’ll need to make this wonderful cheesecake:
Cream Cheese
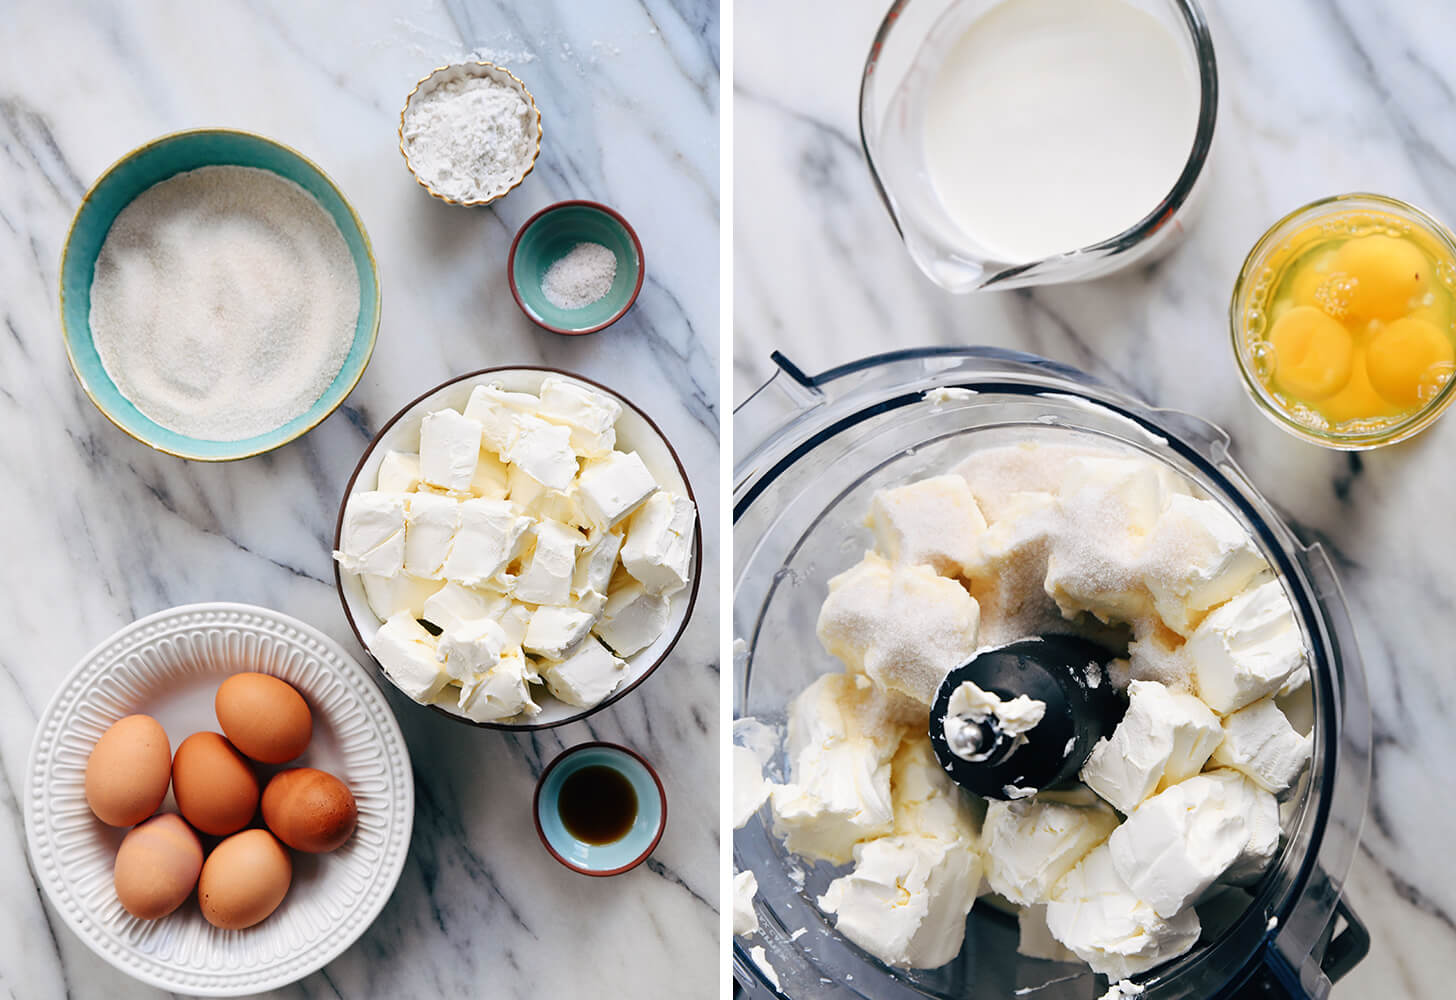
Like other cheesecakes, this Basque cheesecake relies on cream cheese for its heft, creaminess and tang. You’ll need two pounds for this recipe, which is four eight-ounce blocks of cream cheese. Do not substitute “cream cheese spread” or whipped cream cheese for this recipe.
Sugar
Plain old sugar is best here. I tried making the recipe with honey, and it simply wasn’t as good or as creamy. For a lightly sweet cheesecake that still tastes like a treat, use one and one-fourth cups sugar. For more traditional sweetness, add another one-fourth cup. Sweetness is subjective, but we found the sweetness cloying when we used closer to two cups.
Heavy Cream
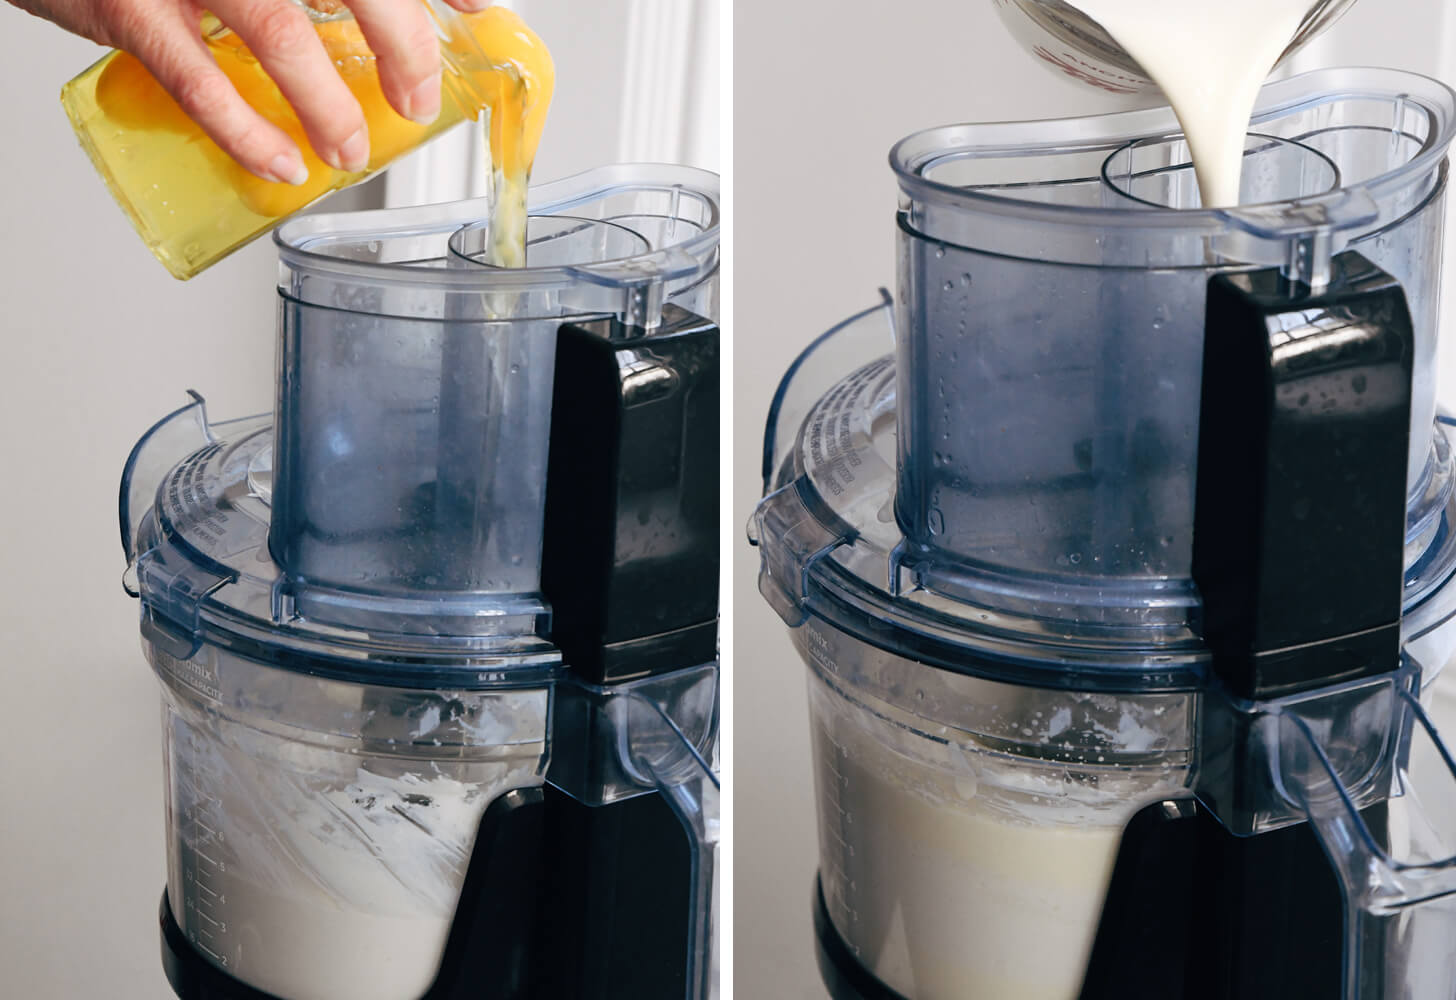
Heavy cream thins out the cream cheese mixture without watering it down. We’ll need one pint of heavy cream for this recipe. We’ll use a portion of it upfront with the cream cheese to help mix it, then we’ll add the rest later.
Eggs
Cheesecake relies on eggs for structure. A half-dozen eggs is just right; seven eggs tastes distractingly eggy.
Vanilla Extract
While technically optional, a light splash of vanilla ramps up the flavor a bit.
Flour
A small amount of flour absorbs excess moisture, which becomes more apparent the next day. You have several options. All-purpose flour works well, as does sifted whole wheat flour (unsifted will leave little flecks of bran in your cheesecake). To make the cheesecake gluten free, we successfully used Bob’s Red Mill Gluten Free 1-to-1 Baking Flour.
Watch How to Make Foolproof Basque Cheesecake
Basque Cheesecake Tips
Let Basque cheesecake be.
I tried several variations of Basque cheesecake—with added orange zest, honey instead of sugar, Greek yogurt instead of cream cheese, macerated strawberries on top, and so on. Basque cheesecake is truly best served plain. With the caramelized top, it is not boring in any way. It’s a delight! If you want to add some presentation value, try serving with a ripe red strawberry on the side.
Use a food processor or mix on low.
For the best texture, avoid whipping air into the batter or over-mixing the batter. This is key! Use a large food processor if you have it (minimum 12 cups capacity) or a mixer on low speed. The low mixing speed might take a few extra minutes, but it’s worth the wait.
Know when it’s done.
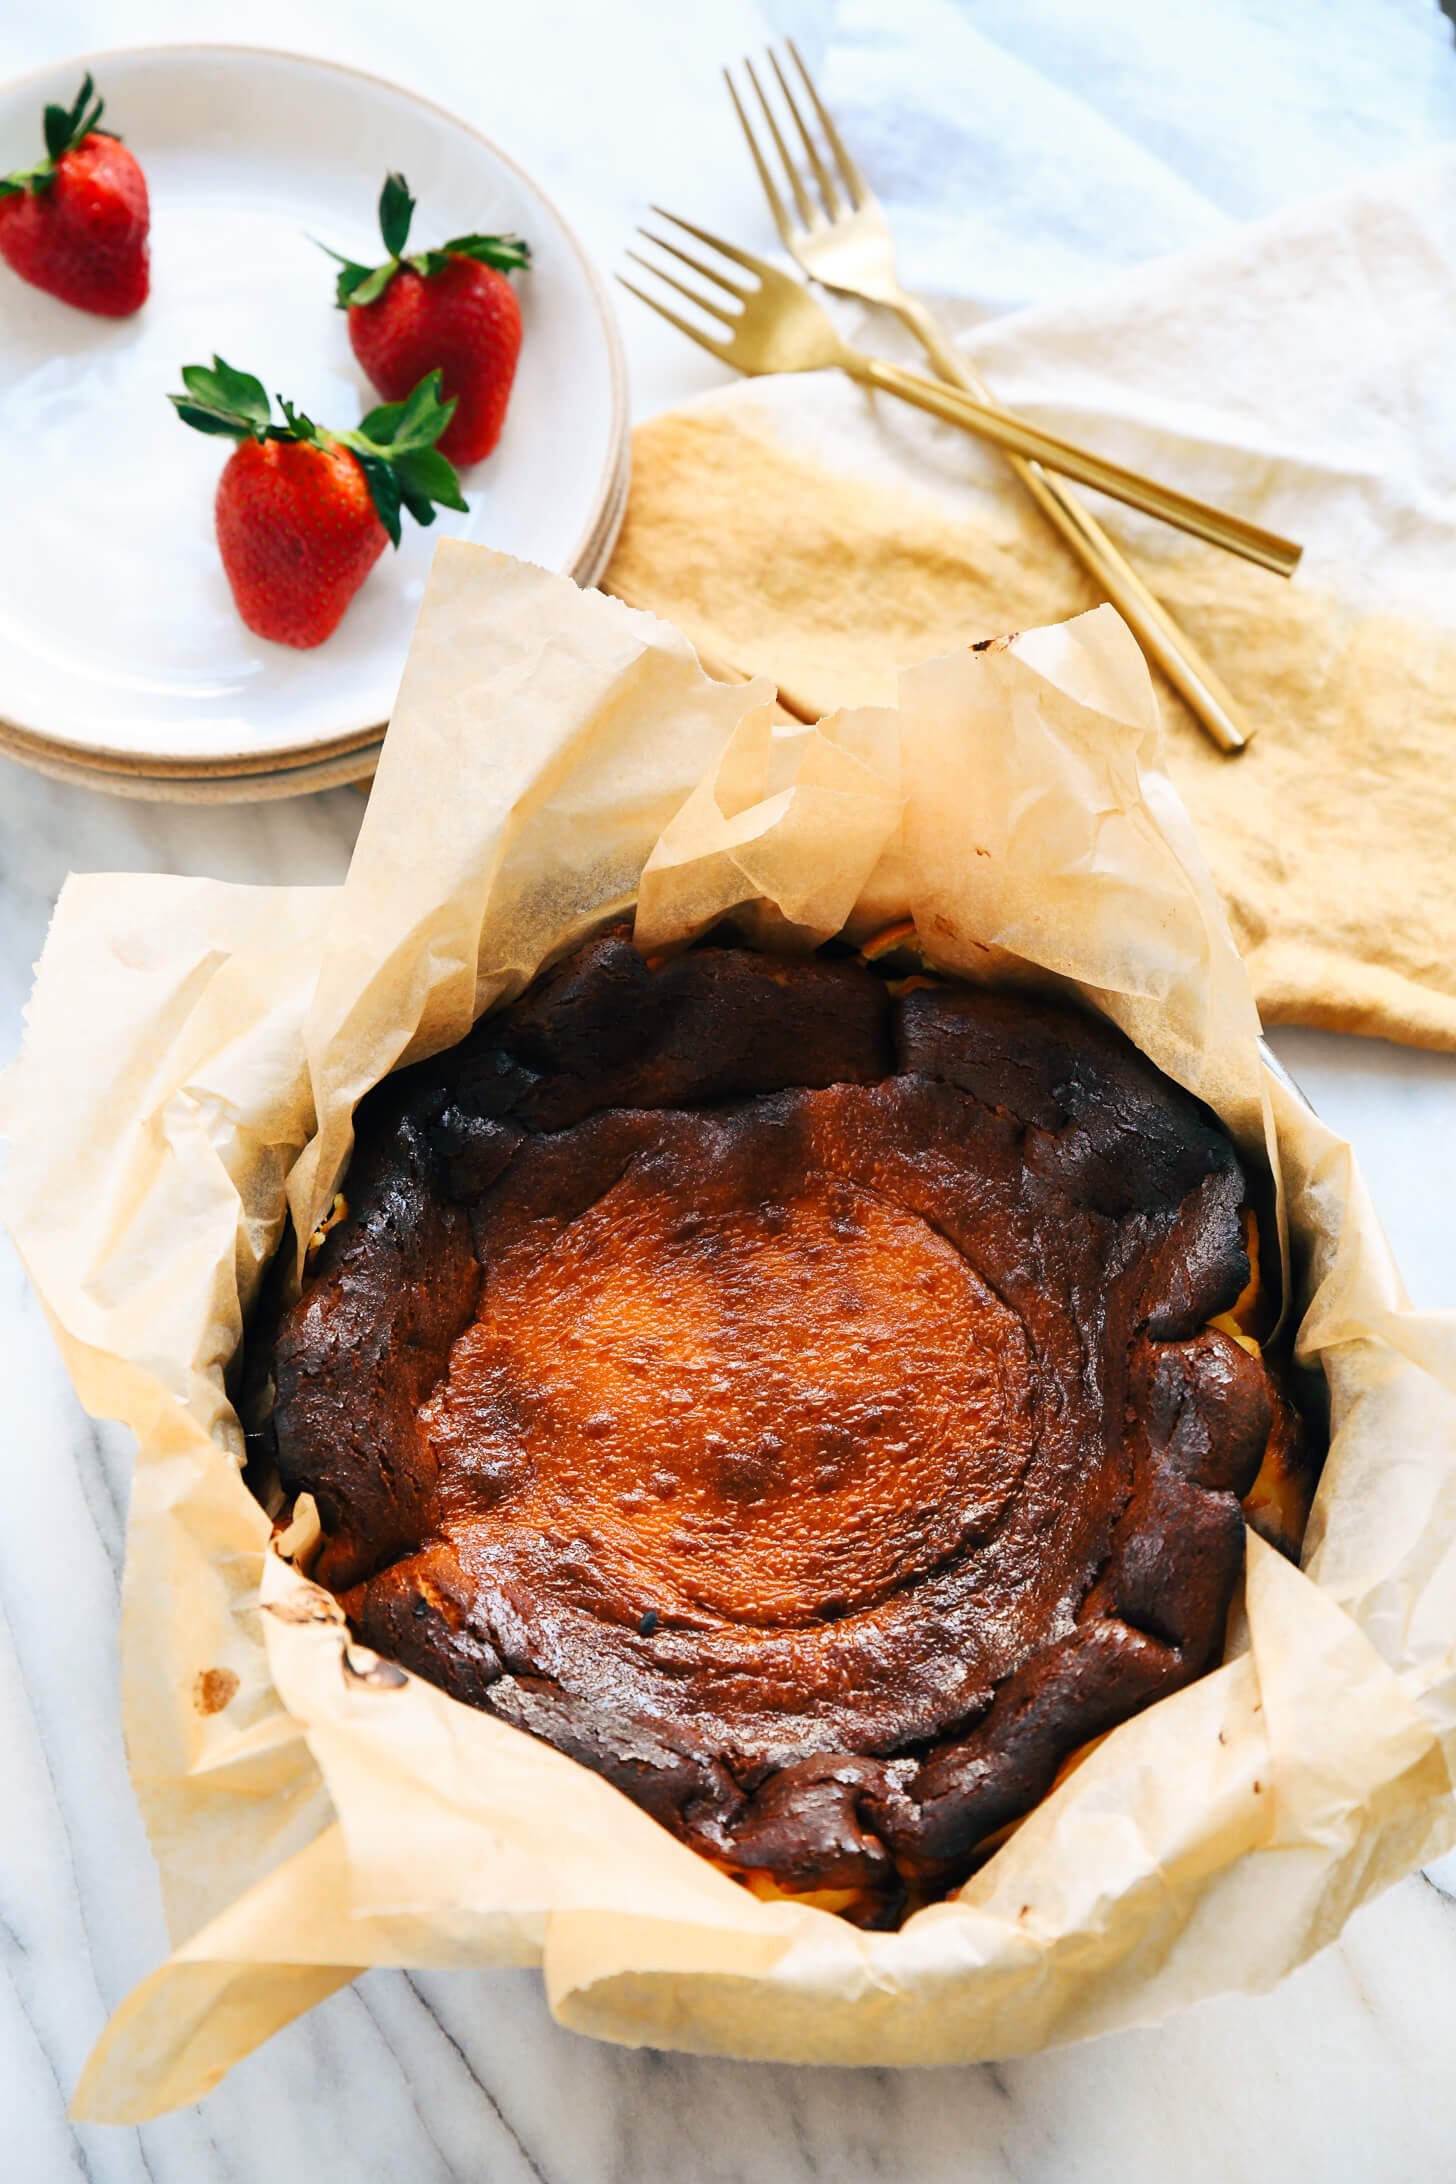
Bake until the cheesecake is deeply golden brown on top and still very jiggly in the center, about 60 to 65 minutes. Once cooled, the center will solidify well enough to slice, and the top will deflate and turn darker and more shiny.
Recommended Equipment
If you bake somewhat regularly, you’ll probably have everything you need for this recipe. You really do need these items to bake Basque cheesecake at home (the links are affiliate links):
Large food processor or mixer
Use a large food processor (minimum 12 cups—I used my Vitamix food processor attachment), or a stand mixer (good deals on KitchenAid at Target right now!), or a hand mixer with a large mixing bowl (I’m partial to this 7-speed mixer). I tried making this cheesecake by hand and it was so difficult that I gave up.
Parchment paper
You’ll need parchment paper for lining the pan. Without parchment paper, your cheesecake will overflow into the oven!
Springform pan
Lastly, you’ll need a 9-inch springform pan for baking the cheesecake. The springform pan is the ideal height and also allows you to easily remove the sides before serving.
If you only have a 10-inch springform pan, that will likely work. Your cheesecake might be done a bit sooner, so keep an eye on it as the time approaches and follow the visual cues provided. I don’t recommend substituting a cake pan for this recipe, as the sides are probably too short.
How to Serve Basque Cheesecake
Basque cheesecake, like most baked goods, tastes even better the next day. The flavors become more complex and well developed. Make the cheesecake in advance if you have the time.
Some suggest serving Basque cheesecake at room temperature. I like this cheesecake served anywhere from lightly warm to straight-out-of-the-refrigerator chilled. I even like it straight out of the freezer. In other words, I’m not picky about the temperature.
If you’d like to liven up the plate, simply serve your slices with a red strawberry on the side.
At La Viña, they often serve the cheesecake with a glass of sweet Pedro Jimenez sherry. I love this cheesecake with a glass of dry white wine, like an Albariño or Sauvignon Blanc, or a dry rosé. You could also try a dry, funky cider like you’ll find in San Sebastián. We love ANXO cider.
More Dessert Recipes to Try
If you enjoy this cheesecake recipe, try these as well:
Please let me know how your Basque cheesecake turns out in the comments! I love hearing from you.
Basque Cheesecake
- Author:
- Prep Time: 30 minutes
- Cook Time: 60 minutes
- Total Time: 1 hour 30 minutes
- Yield: 12 slices 1x
- Category: Dessert
- Method: Baked
- Cuisine: Basque
- Diet: Vegetarian
This Basque cheesecake is rich, creamy and utterly foolproof. It’s also very easy to make, as far as cheesecakes go! Recipe yields 12 slices.
Scale
Ingredients
- 2 pounds cream cheese, at room temperature
- 1 ¼ to 1 ½ cups sugar, depending on desired level of sweetness
- 2 cups heavy cream, divided
- 6 large eggs
- 1 teaspoon vanilla extract
- ½ teaspoon fine salt
- ⅓ cup all-purpose flour
Instructions
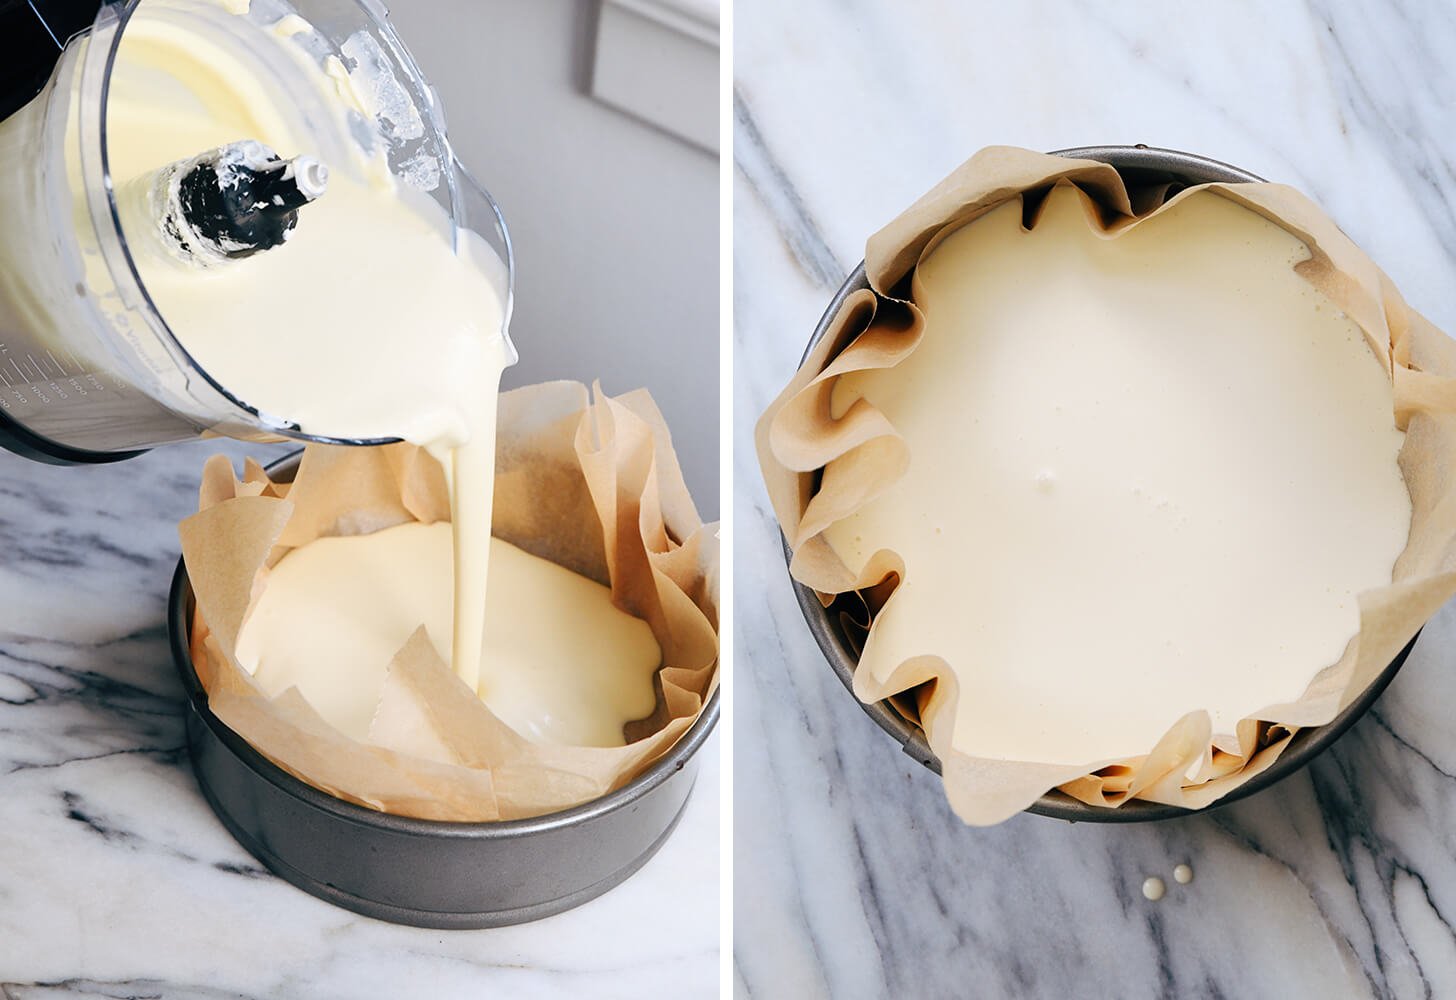
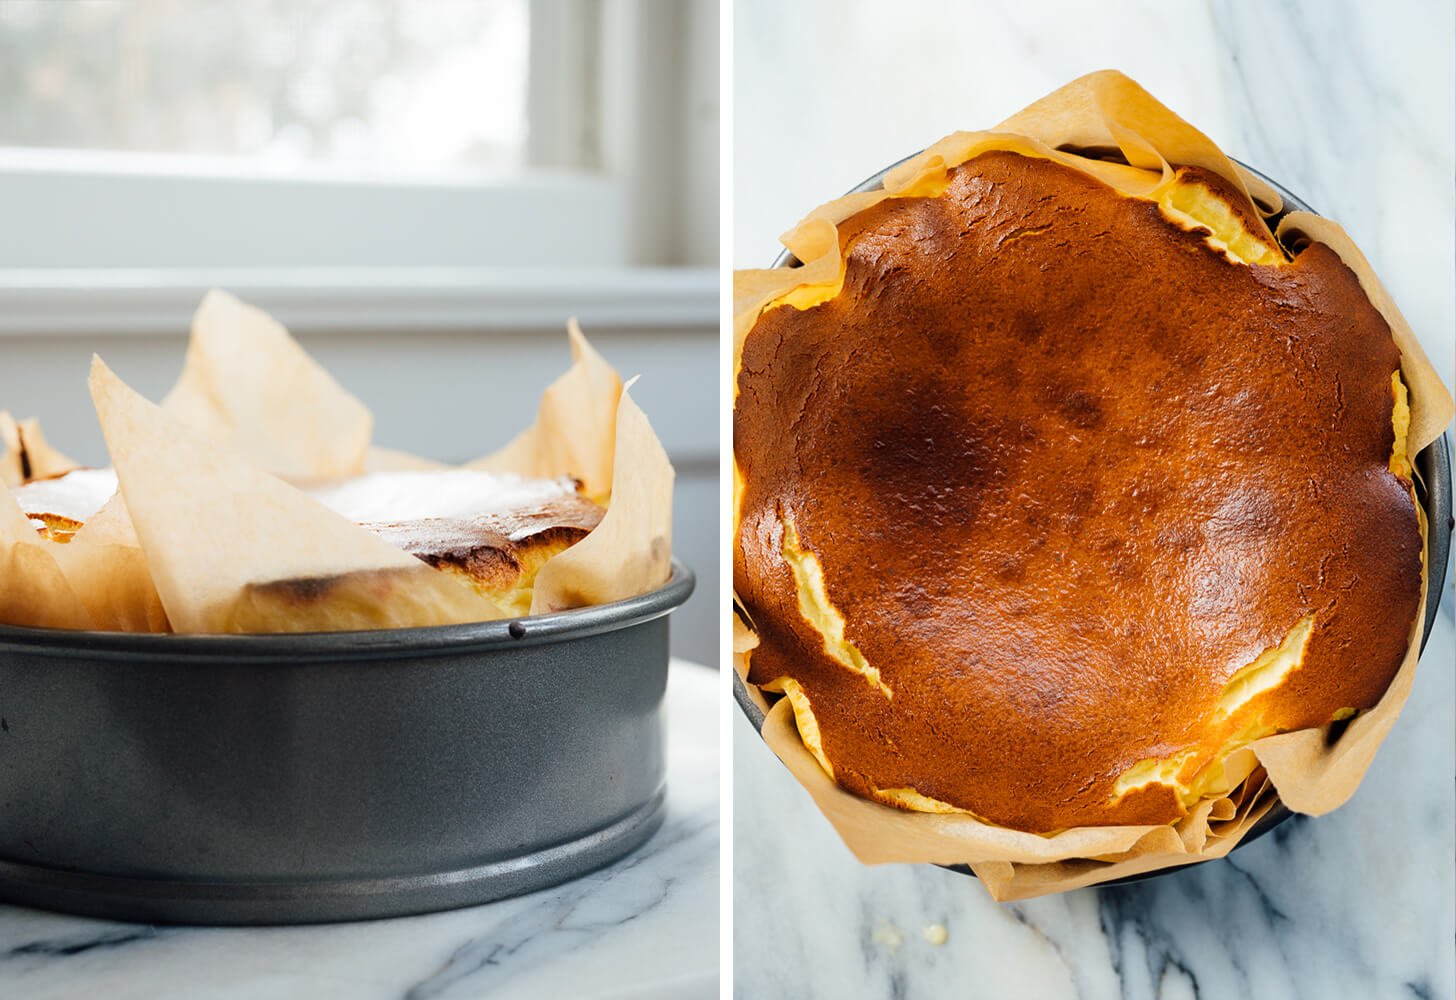
- Place a rack in the middle of the oven, with no rack above it so the cheesecake has plenty of space to rise. Preheat the oven to 400 degrees Fahrenheit. Tear off two generous sheets of parchment paper. Cross one on top of the other and press them into the base of a 9-inch springform pan. Roughly pleat the sides of the parchment against the pan to help make room for the cheesecake. Ideally, the paper will rise at least 2 inches all the way around the pan.
- In a large food processor (minimum 12-cup capacity), stand mixer or large mixing bowl (with a hand mixer), combine the cream cheese, sugar, and about ½ cup of the cream. Process (or mix on low speed) until the mixture is very smooth and the sugar has dissolved, pausing to scrape down the sides of the bowl as necessary, about 2 minutes.
- In the meantime, crack the eggs into a 2-cup liquid measuring cup. While blending, pour in all of the eggs at once and blend until smooth. Reserve the measuring cup.
- Pause and scrape down the sides if necessary. Pour in the remaining cream, plus the vanilla and salt. Process until combined, about 30 seconds (this will take a little longer if using a mixer).
- Pour 1 cup of the mixture into the measuring cup. Whisk the flour into the mixture until smooth (this prevents the flour from flying everywhere when mixed). Pour the contents of the cup back into the food processor and blend until smooth, about 10 to 20 seconds.
- Pour the batter into the prepared springform pan. Gently jiggle the pan to distribute the batter evenly. Take a moment to crease the folds of the paper more sharply so they rest against the side of the pan. Bake until the cheesecake is deeply golden brown on top and still very jiggly in the center, about 60 to 65 minutes.
- Place the cheesecake on a cooling rack (it will fall dramatically as it cools). Let it cool for about an hour before serving it or refrigerating it for later, covered.
- To serve, release the outer piece of the pan and peel away the parchment from the sides of the cheesecake. Slice the cheesecake into wedges and enjoy. The cheesecake will keep well in the refrigerator for up to 5 days, or in the freezer for up to 3 months (the cheesecake is sliceable even when frozen, so you can thaw individual slices if preferred).
Notes
Recipe adapted from Bon Appétit, Taste Cooking and King Arthur Flour.
Make it gluten free: Substitute all-purpose gluten-free flour blend. We successfully used Bob’s Red Mill Gluten Free 1-to-1 Baking Flour.
▸ Nutrition Information
Did you make this recipe?


